Don’t get us wrong, we’re huge fans of the grill. There’s nothing quite like a perfectly charred steak, fresh off the hot coals of a grill. And don’t even get us started on smoked meats. We’re Kansas City natives, barbecue and the deep smokey aroma are basically in our DNA.
But what about pan-seared? If you’ve been to any steak house, there is a good chance you’ve had pan seared steak, and a good one at that. So, how do you achieve that restaurant-quality taste at home you ask? Well look no further, Kansas City Steaks has compiled the ten best pan-searing tips for perfection.
Top 10 Tips for Pan-Seared Steak
Thickness: Without a decent amount of thickness in the steak, it will become difficult for you to taste the difference from the inside and the outside of the steak once cooked. That’s because too-thin steaks overcook easily and do not allow for a nice crust to develop before becoming well-done. Strive for a steak at least an inch and half thick (and remember, sharing is caring). This will ensure a longer cooking time for the crust and well-proportioned doneness.
Aging: An aged steak, whether wet-aged or dry-aged, will always be more tender than a straight from the local butcher shop (or grocery store) piece of meat. This is because the meat has had a chance to rest and the natural enzymes within the muscle fiber have had a chance to break down the tougher connective tissue. Here at Kansas City Steaks, we wet age our meat for 28 days. This allows for maximum flavor and tenderness.
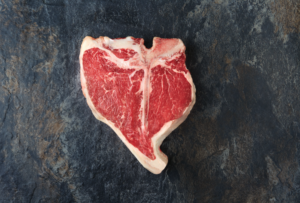
Kansas City Steak Porterhouse
Bone-In: Majority of Chefs swear by bone-in cuts of meat for pan searing, citing an additional dimension of flavor added to the cut from the bone and marrow. We tend to agree. Just remember, when meat on the bone cooks, it shrinks, making the bone protrude a bit more prominently and may not allow for an even cook. This is where the basting technique comes in real handy! Ribeyes and porterhouses are our go-to for pan-searing.
Grading: Good grades matter in school and for pan searing. Our meat is all Grade Choice+. This means our steaks have a superior taste, tenderness and a premium quality, attributes that are not readily available at grocery stores and butcher shops’ meat selections.
Season, Season, Season: Did you know salt is a steak’s best friend? And for pan searing it is no different. We like to apply our Original Steak Seasoning about 20 minutes before searing. The salt and spices mixture is our go-to and we are not afraid to use a liberal portion. It adds just the right amount of bite and makes the crust extra crispy.
High Heat: Need we say more? Without starting a full-fledged kitchen fire, make sure your stovetop heat is up pretty darn high, this will help the salted crust and marbled fat melt and caramelize quickly to lock in flavor. Cast iron pans were made for this job.
Oil & Basting: We are searing the steak not frying, so we reserve our butter for basting. Instead, we apply a bit of oil directly to the steak for that initial sizzle (and no stick application). Once cooking, we’ll drench the steak in foaming brown butter by adding half a stick to the pan and continually spooning it over the meat. Basting is also an opportunity to add a few fresh herbs to the flavor profile. Our go-to combo is rosemary and garlic.
Proper Tools: It goes without saying a cast iron pan is imperative for a good pan-sear. It is able to heat up to high temps and has an even distribution of heat making for a great sear. Other tricks and tools of the trade are a pair of metal tongs and meat thermometer to hit that 130 degree sweet spot.
Go Against the Grain: This is a no-brainer for most steak enthusiasts, but we must remind you to go against the grain of the meat to lock in the flavor you so feverishly worked to keep in.
Patience: You’ve worked so hard to achieve the perfectly cooked steak, you can wait 10 more minutes to enjoy. Let the steak rest on a clean plate, covered with aluminum foil to allow for the flavors to blend and rest. It’s well worth the wait.
We could keep going, but now we’re hungry.
Have your own tips, tricks or suggestions? Comment below or show us on Instagram by using the hashtag #KCSteaks to show us your creation.